Set up CMEK with Azure Key Vault
Create an Azure Key Vault key, give Anthropic access to it, and put it to use in Claude Platform or Claude Enterprise.
Claude Code
Let Claude Code set up this feature for you
/claude-api help me configure a customer-managed encryption key with Azure Key VaultBefore you start
In Claude:
- Customer-managed encryption keys (CMEK) are turned on for your organization.
- You have your Anthropic organization ID, the UUID without the
org_prefix. Copy it from Organization in the Claude Console, or from Organization settings > Organization and access on claude.ai. Whoever creates the key needs it. - You’re an Organization Admin on Claude Platform, or an Owner or Primary Owner on Claude Enterprise.
- On Claude Platform, you have a workspace that retains data, ideally a new one, because existing data stays under Anthropic’s key.
- On Claude Enterprise, you know which features turn off or change.
In Azure:
- You can create keys in your key vault and assign RBAC roles on it.
- You can create service principals in your Entra tenant (Application Administrator, Cloud Application Administrator, or an equivalent custom role).
- The vault has a diagnostic setting for the
AuditEventlog category. Without one, Anthropic’s key operations leave no audit trail.
In Azure: create the key
After a failed Verify or Add, see the fixes for Azure Key Vault.
These steps give Anthropic’s multitenant application access to your key:
- Name:
anthropic-cmek-client-us - Client ID:
8635ae1a-3e5d-44e8-a4ed-e0f614466f87
Use only this client ID and name, never ones sent by email or chat. The application requests no Microsoft Graph permissions.
Check the vault
For the lowest latency, use a vault in northcentralus or eastus2. Run this first, in the Azure CLI or Cloud Shell:
az keyvault show --name <your-vault-name> \
--query "{rbac:properties.enableRbacAuthorization, purge:properties.enablePurgeProtection, pub:properties.publicNetworkAccess, net:properties.networkAcls.defaultAction, ipRules:properties.networkAcls.ipRules, uri:properties.vaultUri, tenantId:properties.tenantId}"| Field | Must be |
|---|---|
rbac | true |
purge | true. If it’s false or null, turn on purge protection first. You can’t turn it off again. |
pub | "Enabled". Private endpoints aren’t supported. |
net | "Allow", or "Deny" with Anthropic’s outbound IP addresses in ipRules |
Copy uri (the vault URI) and tenantId.
Create the key and grant access
On this page, <ORGANIZATION_UUID> is your Anthropic organization ID in lowercase. To use a key you already have, add the organization tag first.
Create Anthropic’s service principal
Open Cloud Shell from the portal’s top navigation bar. Run this command:
az ad sp create --id 8635ae1a-3e5d-44e8-a4ed-e0f614466f87If the service principal already exists, continue to the next step.
Confirm the service principal exists
Go to Microsoft Entra ID > Enterprise applications and clear the default application-type filter. Search for
anthropic-cmek-client-us.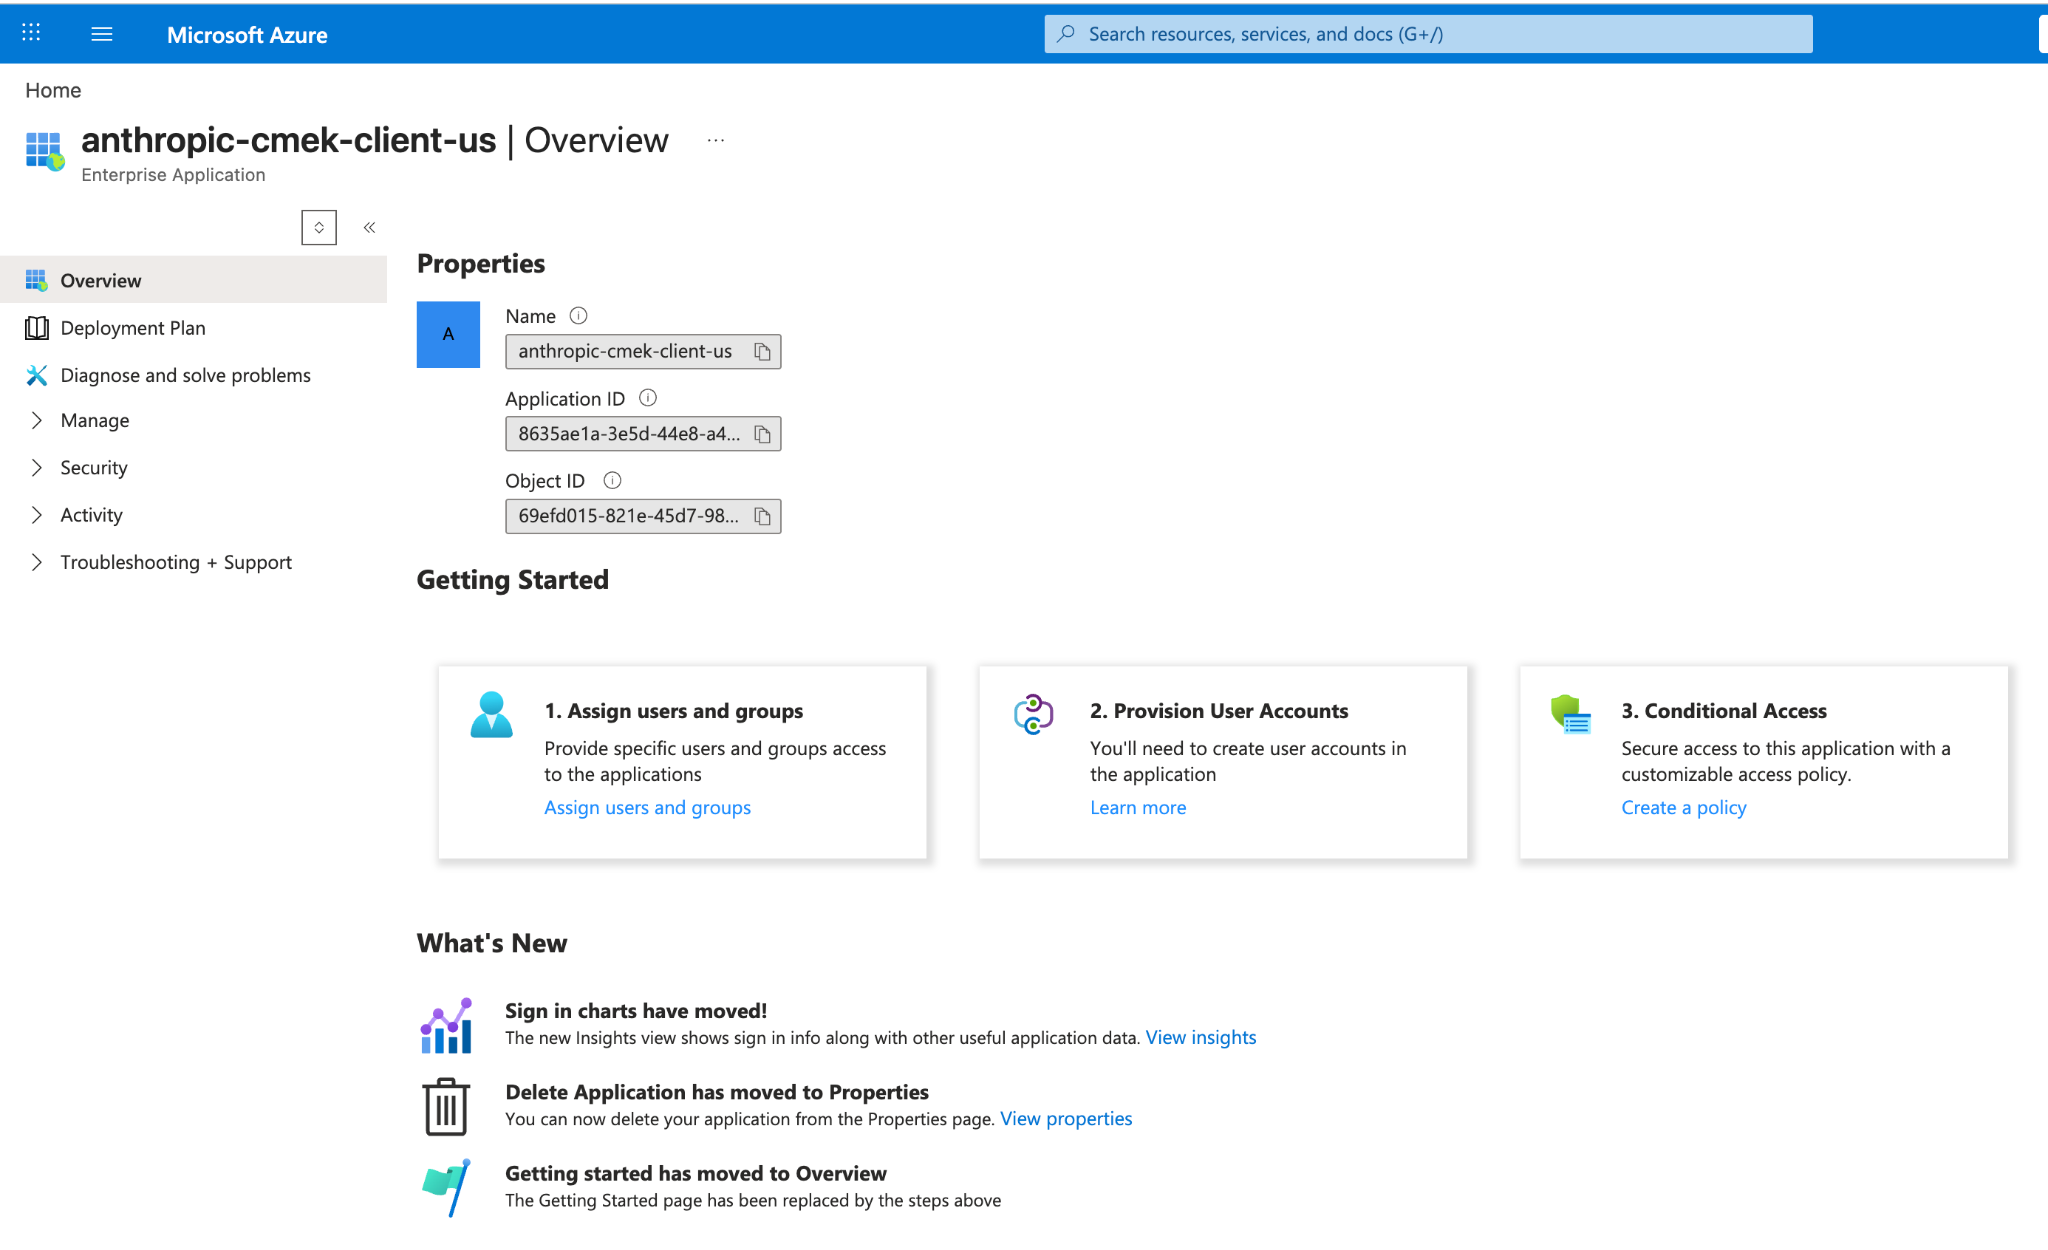
The anthropic-cmek-client-us service principal in Entra enterprise applications. Open the Create a key page
Open your key vault and select Keys. Click Generate/Import.
Create an RSA key in your vault
Set these values:
- Name: a name for the key
- Key type: RSA
- RSA key size: 3072 or larger
Click the link next to Tags.
Add the organization tag
Enter these values:
- Tag Name:
anthropic-org-<ORGANIZATION_UUID> - Tag Value:
true
Click OK, then click Create.
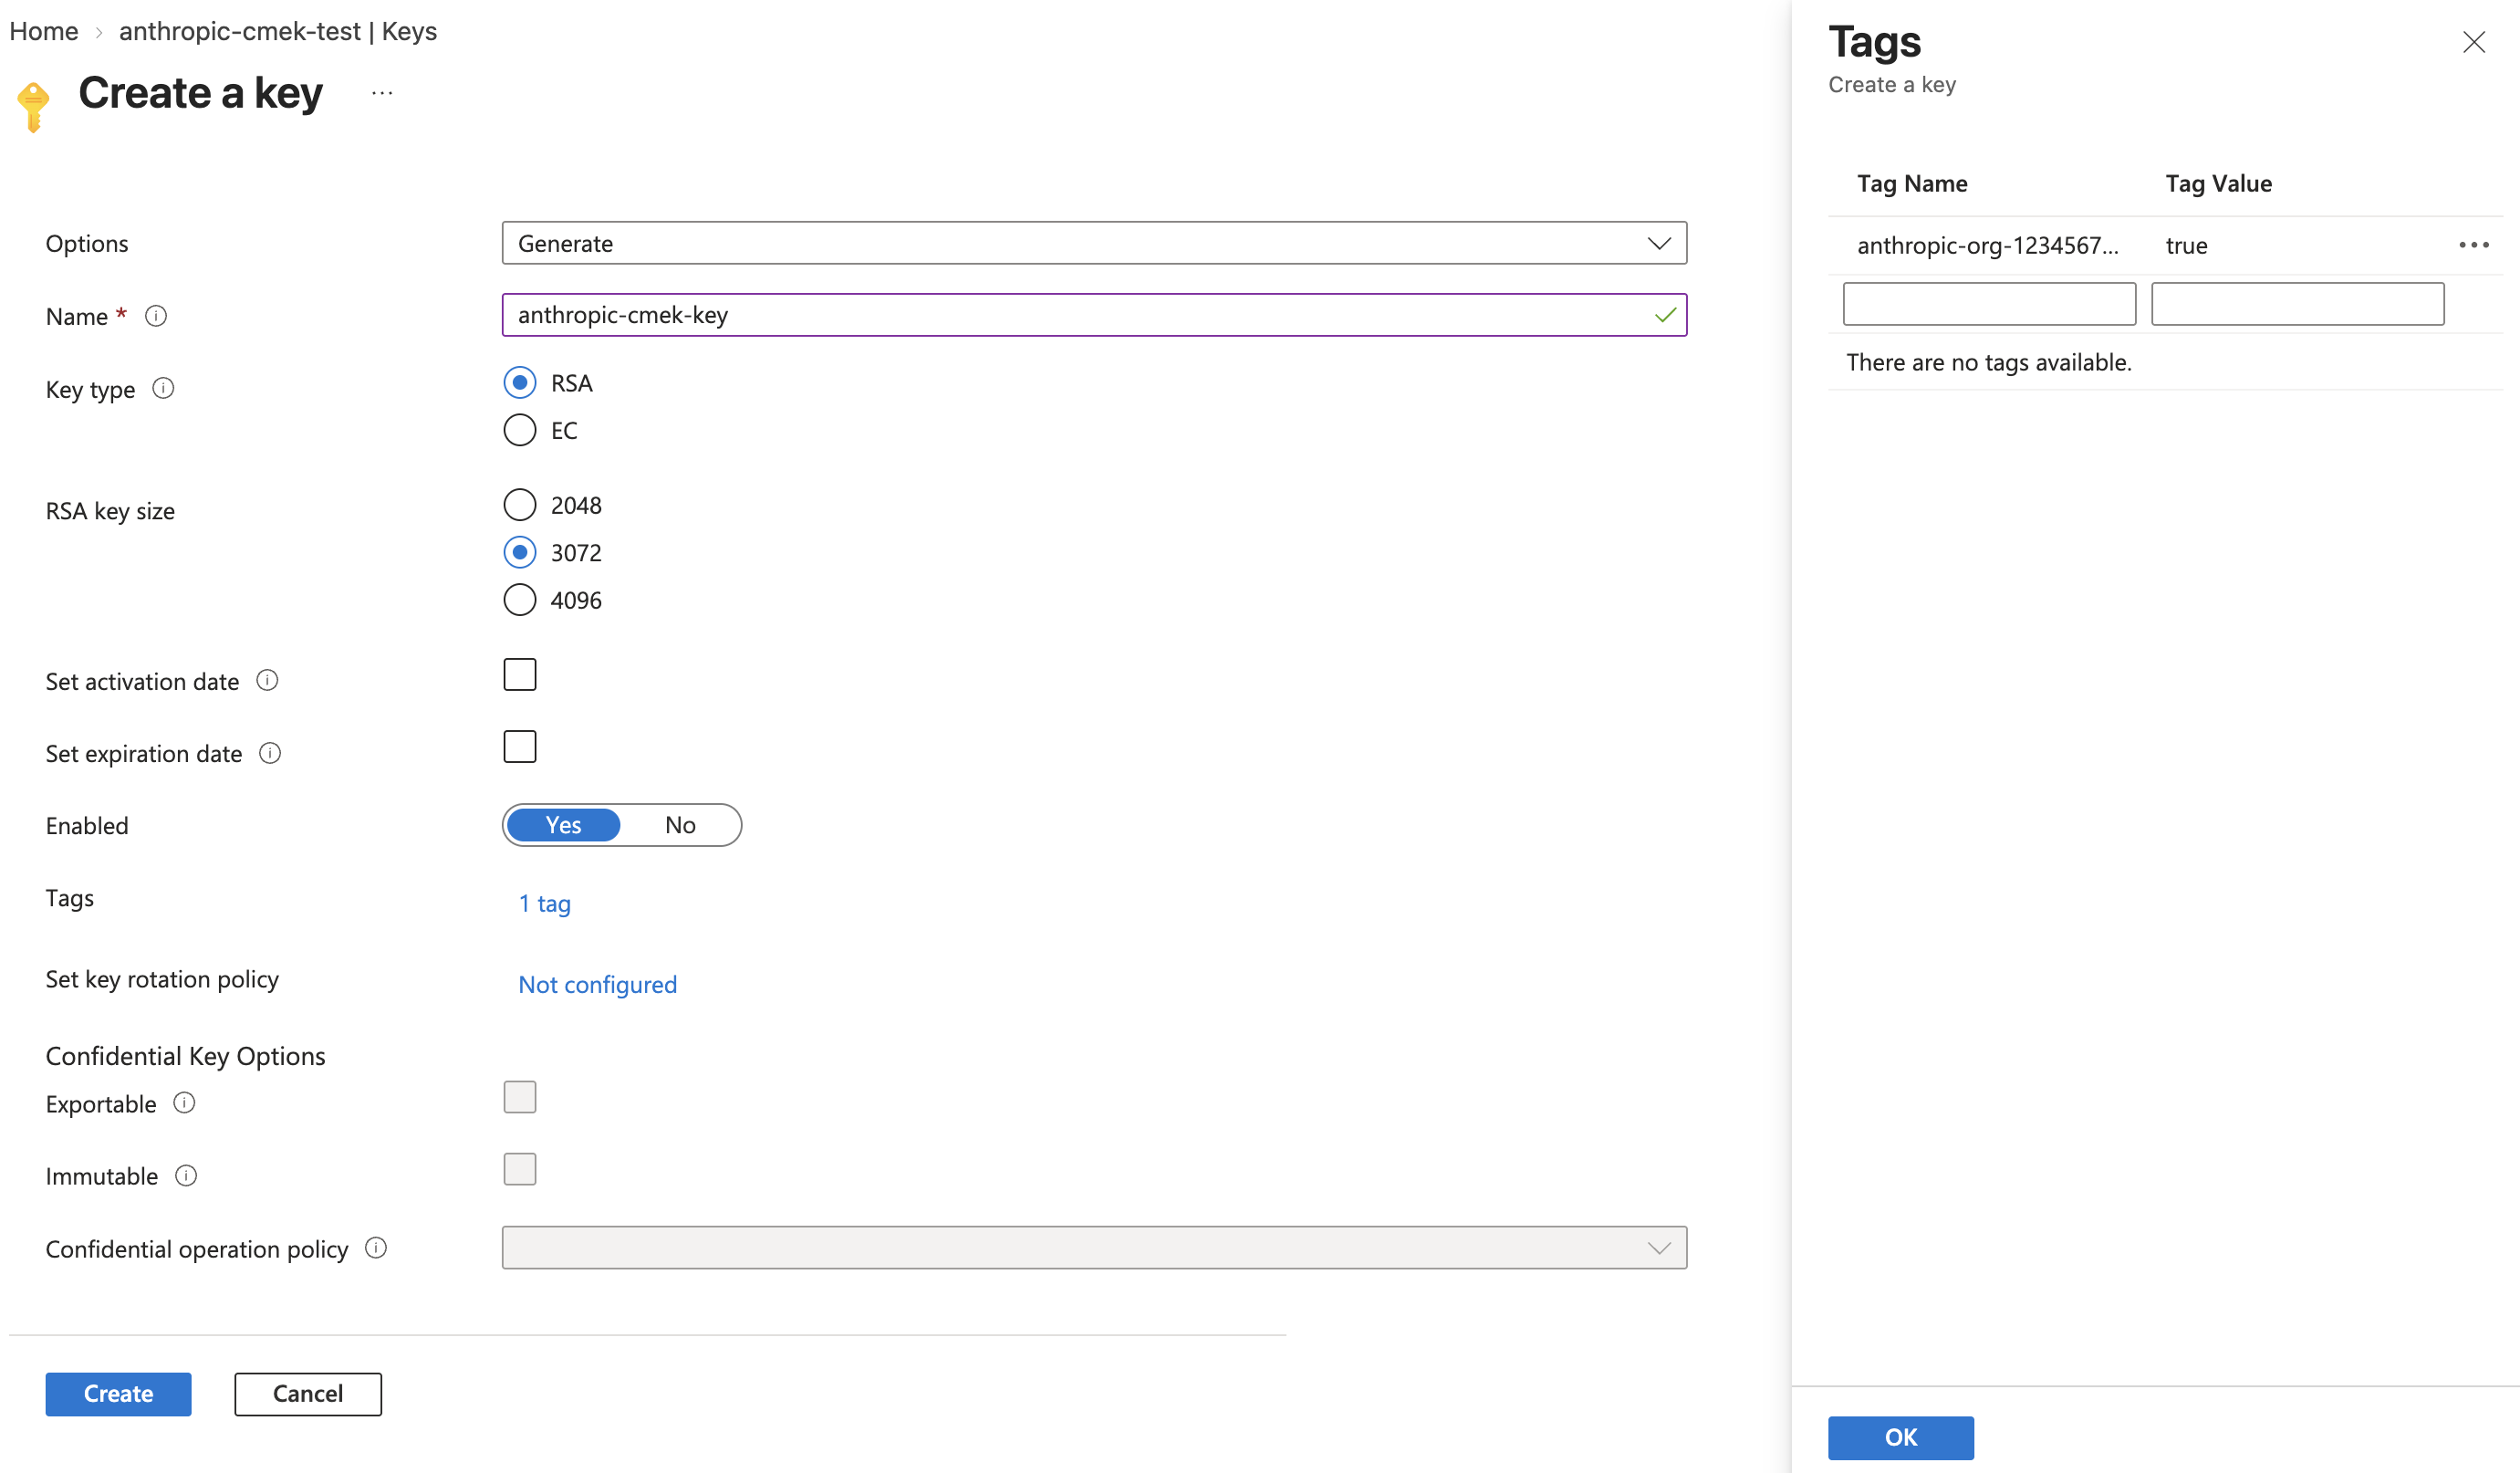
Create an RSA key sized 3072 or larger, with the tag anthropic-org-<ORGANIZATION_UUID> set to true. - Tag Name:
Limit the permitted operations
Open the new key, then open its current version. Under Permitted operations, clear every checkbox except Wrap Key and Unwrap Key. Click Save.
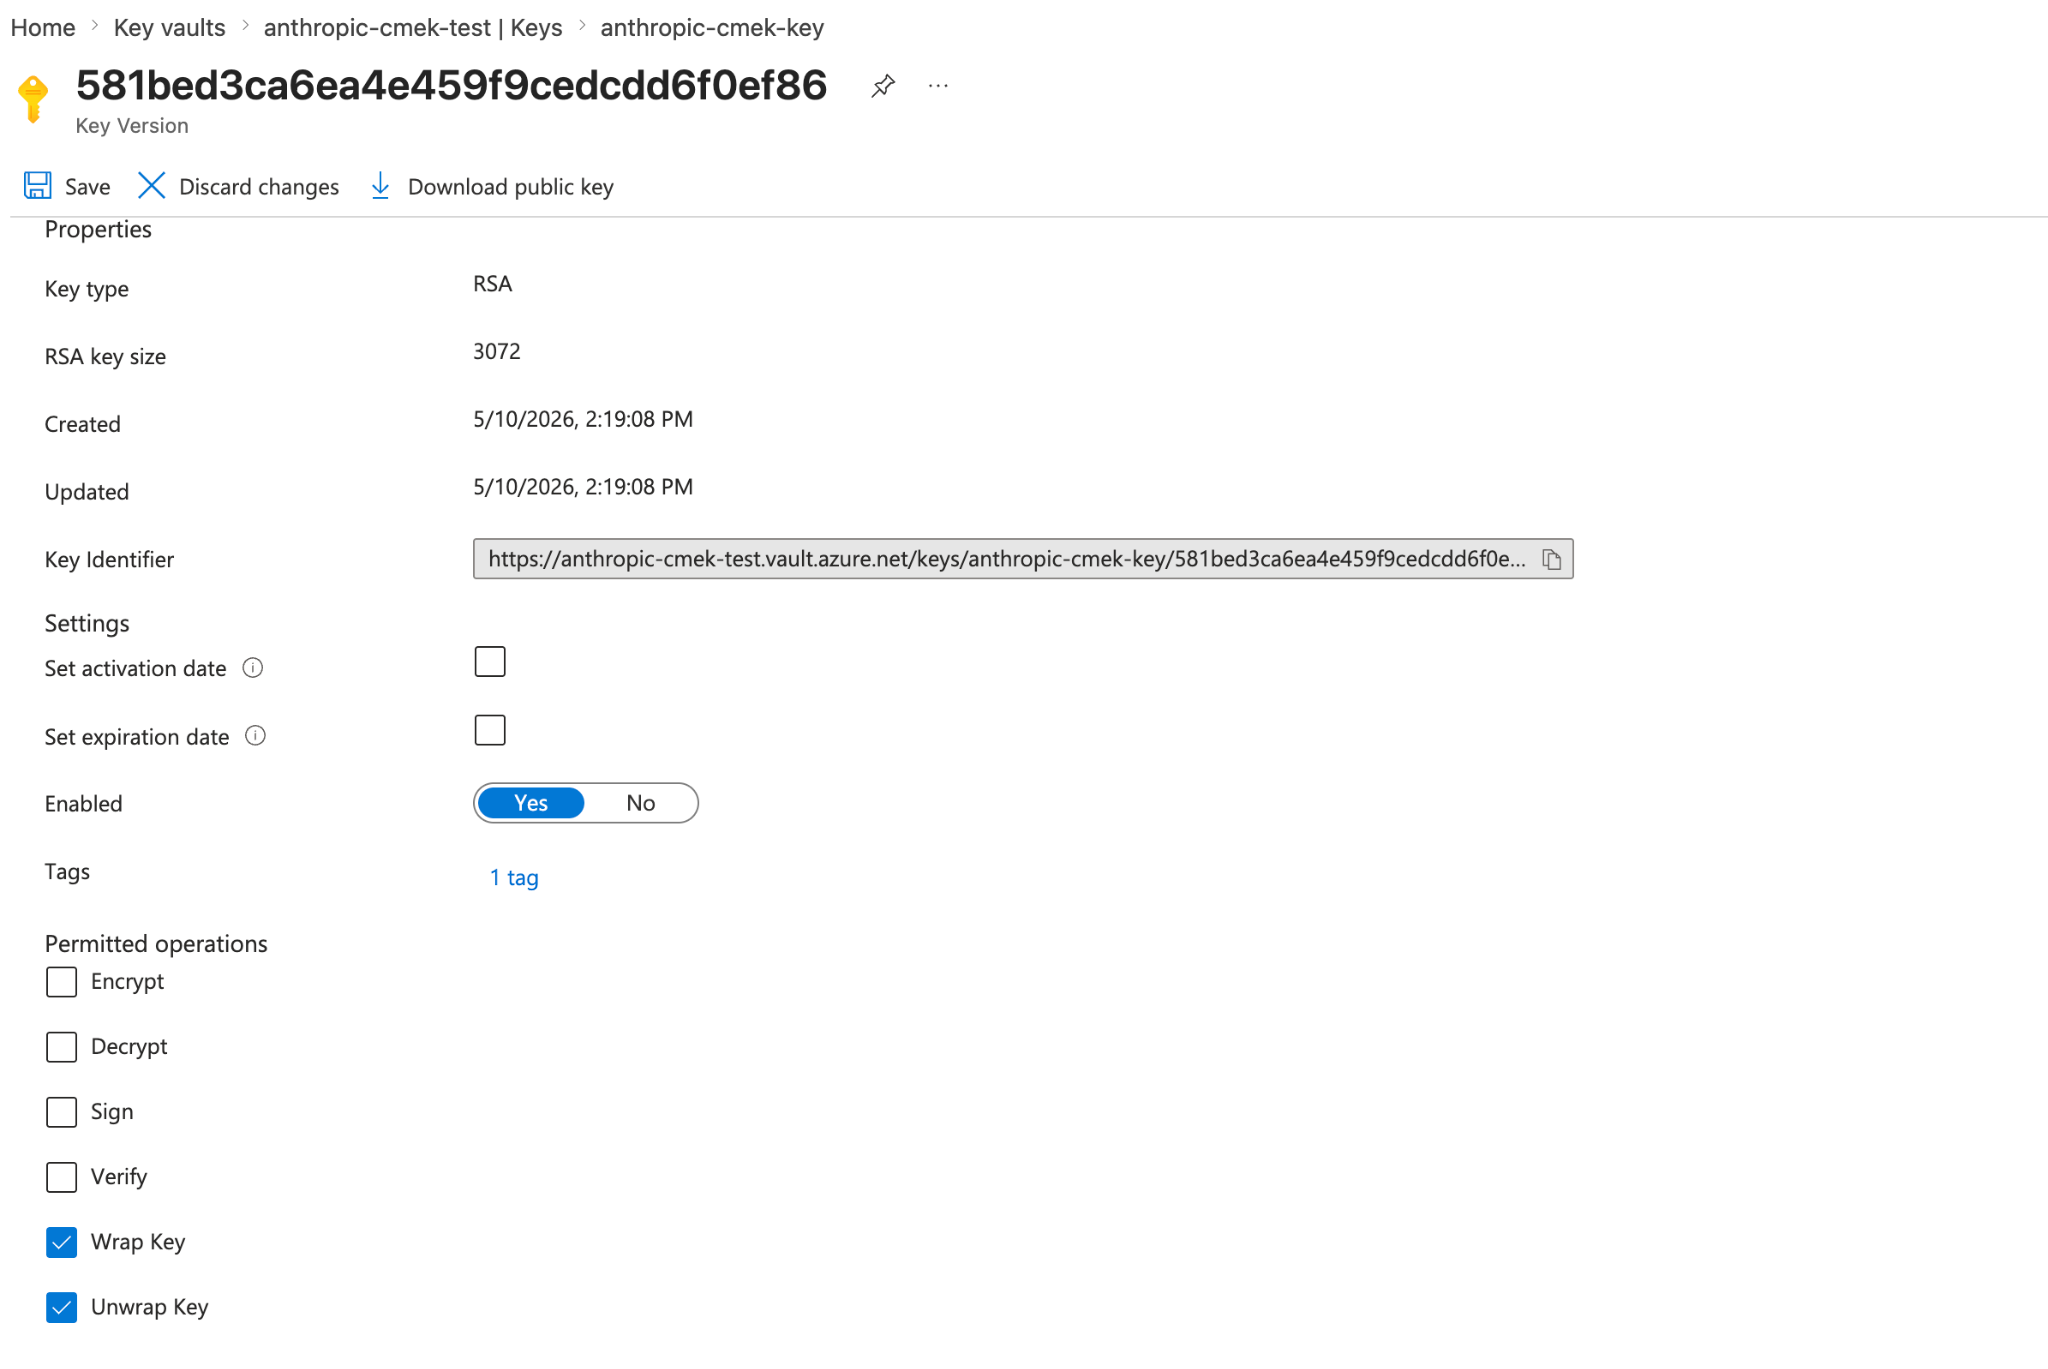
Restrict permitted operations to Wrap Key and Unwrap Key. The key version shows the organization tag. Open the key’s access control
Open the key itself, not the vault. Select its Access control (IAM) tab and click Add > Add role assignment.
Select the role
On the Role tab, select Key Vault Crypto User. Click Next.
Add Anthropic’s service principal
On the Members tab, click Select members. Search for
anthropic-cmek-client-usand select it. Click Select, then click Next.Review and assign
On the Review + assign tab, click Review + assign.
Create Anthropic’s service principal
az ad sp create --id 8635ae1a-3e5d-44e8-a4ed-e0f614466f87Copy the
idfield from the output.If the command exits with an “already exists” error, get the
idwith this command instead:az ad sp show --id 8635ae1a-3e5d-44e8-a4ed-e0f614466f87 --query id -o tsvCreate an RSA key in your vault
az keyvault key create \ --vault-name <your-vault-name> \ --name <your-key-name> \ --kty RSA --size 3072 \ --ops wrapKey unwrapKey \ --tags anthropic-org-<ORGANIZATION_UUID>=trueReplace the placeholders:
<your-vault-name>: the name of your key vault<your-key-name>: a name for the key<ORGANIZATION_UUID>: your Anthropic organization ID in lowercase
For an HSM-backed key, use
--kty RSA-HSM.Grant the Anthropic service principal access to your key
VAULT_ID=$(az keyvault show --name <your-vault-name> --query id -o tsv) az role assignment create \ --role "Key Vault Crypto User" \ --assignee-object-id <sp-object-id> \ --assignee-principal-type ServicePrincipal \ --scope "${VAULT_ID}/keys/<your-key-name>"Replace the placeholders:
<your-vault-name>: the name of your key vault<sp-object-id>: theidvalue from the first step<your-key-name>: the name of the key
Whoever adds the key in Claude needs the vault URI, the key name, and the tenant ID.
Add the organization tag to a key you already have
Verification fails without the organization tag. The key must be RSA, 3072-bit or larger.
Instead of creating a key, run this command in the Azure CLI or Cloud Shell. It limits the key to wrapKey and unwrapKey. It also replaces the current version’s tags, so list any you want to keep in --tags as name=value.
az keyvault key set-attributes \
  --vault-name <your-vault-name> \
  --name <your-key-name> \
  --ops wrapKey unwrapKey \
--tags anthropic-org-<ORGANIZATION_UUID>=trueYou still need the service principal and role assignment steps.
In Claude: add and attach the key
To script this part on Claude Platform, use the Admin API instead.
Open the encryption key settings
In the Claude Console, open Encryption keys on the Data retention page. If the section isn’t there, select Organization from the dropdown menu at the top.
Add the key
Under Encryption keys, click Add key. Enter a Display name, select Azure Key Vault, and click Continue.
Enter the key details
Check that your key has the Organization tag shown in the dialog box. Enter the Vault URI, Key name, and Tenant ID, leave Client ID empty, and click Add.
Verify the key
In the Encryption keys list, click Verify next to the key. Connected appears when the check passes. If Connection failed appears instead, see Troubleshoot CMEK.
Attach the key to a workspace
- At the top of the Data retention page, select the workspace from the dropdown menu.
- Under Encryption key, select the key and click Save.
- Select the checkbox to confirm that you have read the CMEK documentation, then click Confirm.
You see Workspace settings updated. Once the key takes effect, your cloud provider’s audit log shows Anthropic’s calls to the key.
In a ZDR organization, after you select the workspace, select Standard data retention so that Encryption key appears. After you click Save, click Accept on the data retention terms.
On Claude Enterprise, CMEK applies to the whole organization, and you can add only one key.
Adding the key turns off or changes some features for every user. To try CMEK first, use a separate organization.
Open the encryption key settings
Go to claude.ai > Organization settings > Data and privacy and find Encryption keys.
Add the key
Click Add key. Enter a Display name and select Azure Key Vault. Select the checkbox to confirm that you have read the CMEK documentation, then click Continue.
Enter the key details
Check that your key has the Organization tag shown in the dialog box. Enter the Vault URI, Key name, and Tenant ID, leave Client ID empty, and click Add.
Confirm that the key was added
The check can take up to 30 seconds. When Encryption key configured. appears, click Done. If The encryption key couldn’t be added. appears instead, find the cause and retry.
Your key protects data written from then on. Tell your users which features changed.
Was this page helpful?